


Why DIY Carpet Installation Appeals to Irvine Homeowners
There’s something satisfying about upgrading your home with your own hands. For many Irvine homeowners, DIY carpet installation has become a popular way to refresh a space while staying in control of the process.
Carpet instantly adds warmth, comfort, and style to a room. It softens hard surfaces, reduces noise, and creates a cozy atmosphere that works beautifully in bedrooms, living rooms, and even home offices. In a place like Irvine—where modern design meets everyday functionality—carpet continues to be a go-to choice for homeowners looking to elevate their interiors.
At Sharon & Sons Flooring & Cabinets, families across Orange County have trusted decades of expertise to help them choose flooring that fits both their lifestyle and design goals. While professional installation is always an option, many homeowners are drawn to DIY projects for smaller spaces or straightforward layouts.
DIY carpet installation works best when approached with the right preparation and expectations. It’s not about rushing through the process—it’s about taking thoughtful steps that lead to a clean, polished result.
For homeowners who enjoy hands-on projects, installing carpet can be a rewarding way to transform a room. With the right tools, a clear plan, and a bit of patience, you can create a space that feels comfortable, stylish, and truly your own.
What You’ll Need Before You Get Started
Before diving into installation, it’s important to gather the right tools and materials. Having everything ready from the start helps the process feel smooth and organized.
Essential Tools
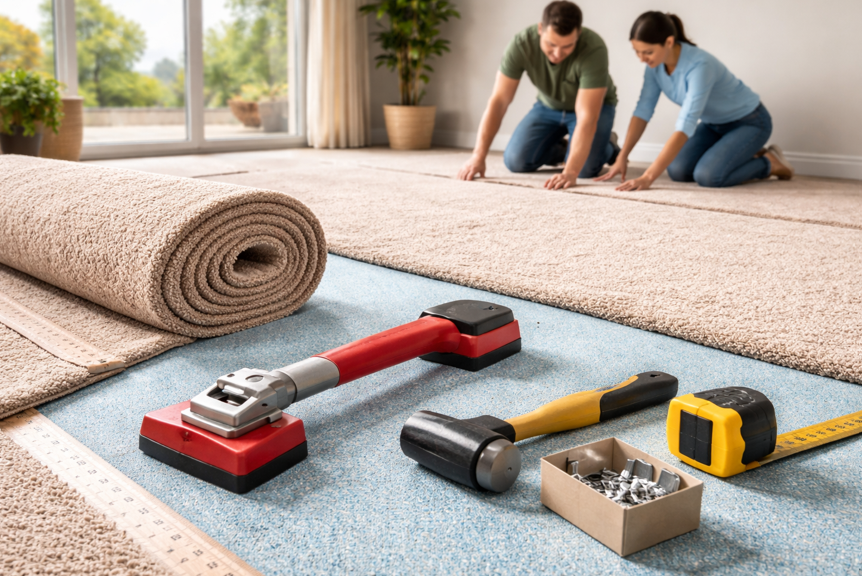
A few key tools make a big difference when installing carpet:
Carpet knife for precise cutting
Measuring tape for accurate sizing
Knee kicker to secure the carpet
Carpet stretcher for a tight, professional finish
Staple gun for securing padding
Each tool plays a role in achieving a clean, well-fitted result.
Materials You’ll Need
Along with tools, you’ll need:
Carpet of your choice
Carpet padding for comfort and support
Tack strips to hold the carpet in place
Adhesive if required for certain areas
Choosing high-quality materials helps ensure your finished floor looks and feels durable and inviting.
Preparing Your Workspace
Clear the room completely before starting. Remove furniture, old flooring, and any debris.
A clean, open space allows for accurate measurements and easier installation. It also helps you focus on each step without interruptions.
Preparing the Subfloor for a Smooth Installation
A successful carpet installation starts from the ground up. The subfloor plays a critical role in how the carpet looks and performs over time.
Clean and Inspect the Surface
Begin by thoroughly cleaning the subfloor. Remove dust, dirt, and any leftover adhesive.
Check for uneven areas, cracks, or damage. Addressing these issues early helps create a stable foundation for the carpet.
Ensure a Level Surface
A smooth, level surface allows the carpet to sit evenly.
If needed, use a leveling compound to correct minor imperfections. This step helps prevent bumps or uneven wear later on.
Install Tack Strips
Tack strips are placed around the perimeter of the room. These strips hold the carpet securely in place.
Position them with the angled pins facing the wall, leaving a small gap between the strip and the wall. This creates a clean edge once the carpet is installed.
Taking the time to prepare the subfloor properly sets the stage for a professional-looking finish.
Installing Carpet Padding for Comfort and Support
Carpet padding is often overlooked, but it plays a big role in the final result.
Why Padding Matters
Padding adds cushioning underfoot and helps extend the life of your carpet. It also improves insulation and reduces noise—perfect for busy households.
Laying the Padding
Roll out the padding across the floor, making sure it covers the entire area.
Trim excess material along the edges and secure the padding using staples or adhesive, depending on the surface.
Keep Seams Tight
If multiple pieces of padding are needed, ensure the seams are tight and aligned. This creates a consistent surface for the carpet.
A properly installed padding layer enhances both comfort and durability, giving your flooring that soft, welcoming feel.
Step-by-Step Carpet Installation Process
Now comes the main event—installing the carpet itself. Taking it step by step helps ensure a smooth and successful outcome.
Measure and Cut the Carpet
Carefully measure the room and cut the carpet to size, leaving a little extra around the edges.
This extra material allows for adjustments and ensures full coverage.
Position the Carpet
Lay the carpet over the padding, aligning it with the walls.
Make sure the carpet sits evenly across the room before securing it.
Secure One Side First
Start by attaching one edge of the carpet to the tack strips using a knee kicker.
This anchors the carpet in place and provides a starting point for stretching.
Stretch the Carpet Across the Room
Use a carpet stretcher to pull the carpet tightly across the room.
This step is key to avoiding wrinkles and creating a smooth surface.
Attach the Remaining Edges
Once stretched, secure the remaining edges to the tack strips.
Trim excess carpet along the walls for a clean, finished look.
For homeowners exploring options before starting their project, high-quality carpet flooring offers a wide range of styles that complement any design vision.
Finishing Touches That Make a Big Difference
The final details are what bring everything together and give your installation a polished appearance.
Trim Edges Cleanly
Use a sharp carpet knife to trim edges neatly along the walls.
This creates a seamless look and ensures the carpet fits perfectly within the space.
Install Transition Strips
If your carpet meets another type of flooring, transition strips provide a smooth connection between surfaces.
They also protect edges from wear over time.
Check for Wrinkles or Loose Areas
Walk across the room and check for any uneven spots.
If needed, make small adjustments to ensure the carpet lies flat and secure.
These finishing touches elevate the overall result, leaving you with a space that feels complete and professionally finished.
Common DIY Carpet Installation Mistakes to Avoid
Even with a solid plan, a few common missteps can affect the outcome. Being aware of them helps you avoid unnecessary setbacks.
Skipping Proper Measurements
Accurate measurements are essential. Taking the time to measure carefully prevents gaps or excess material.
Not Stretching the Carpet Enough
Proper stretching is key to a smooth surface. Skipping this step can lead to wrinkles over time.
Using the Wrong Tools
The right tools make the process easier and more effective. Improvised solutions often lead to uneven results.
Overlooking Subfloor Preparation
A well-prepared subfloor supports the entire installation. Skipping this step can affect both appearance and durability.
Keeping these points in mind helps ensure your project stays on track and delivers a clean, long-lasting result.
When to Consider Professional Installation
While DIY carpet installation can be rewarding, there are times when professional help is the best choice.
Larger or Complex Spaces
Rooms with irregular layouts, stairs, or multiple angles may benefit from expert installation.
Time Constraints
If you’re working on a tight schedule, professional installers can complete the job efficiently.
Achieving a Flawless Finish
For homeowners who want a perfectly seamless look, professional installation provides that extra level of precision.
Sharon & Sons Flooring & Cabinets offers expert installation services designed to make the process smooth and convenient, delivering results that enhance your home’s overall appeal.
Creating Comfortable, Stylish Spaces with Carpet
Carpet has a unique way of transforming a room. It adds warmth, reduces noise, and creates a comfortable environment that feels inviting from the moment you step inside.
With the right approach, DIY carpet installation can be a rewarding project that brings your vision to life. From preparation to finishing touches, each step plays a role in achieving a result you’ll be proud of.
Whether you’re updating a single room or planning a larger renovation, thoughtful choices and careful execution make all the difference.
If you’re ready to explore your options or want expert guidance for your next project, we’re here to help. For personalized support and professional advice, reach out to us and take the next step toward creating a space you’ll love.


